# jupyter-notebook --h
usage: jupyter-notebook [-h] [--log-level NOTEBOOKAPP.LOG_LEVEL]
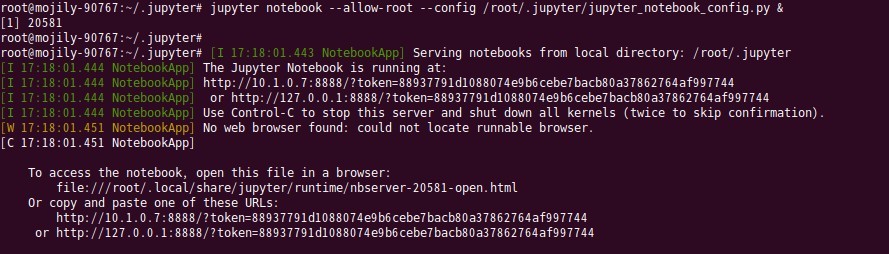
[--config NOTEBOOKAPP.CONFIG_FILE]
[--ip NOTEBOOKAPP.IP] [--port NOTEBOOKAPP.PORT]
[--port-retries NOTEBOOKAPP.PORT_RETRIES]
[--transport KERNELMANAGER.TRANSPORT]
[--keyfile NOTEBOOKAPP.KEYFILE]
[--certfile NOTEBOOKAPP.CERTFILE]
[--client-ca NOTEBOOKAPP.CLIENT_CA]
[--notebook-dir NOTEBOOKAPP.NOTEBOOK_DIR]
[--browser NOTEBOOKAPP.BROWSER]
[--pylab [NOTEBOOKAPP.PYLAB]]
[--gateway-url GATEWAYCLIENT.URL] [--debug]
[--generate-config] [-y] [--no-browser] [--no-mathjax]
[--allow-root] [--script] [--no-script]
optional arguments:
-h, --help show this help message and exit
--log-level NOTEBOOKAPP.LOG_LEVEL
--config NOTEBOOKAPP.CONFIG_FILE
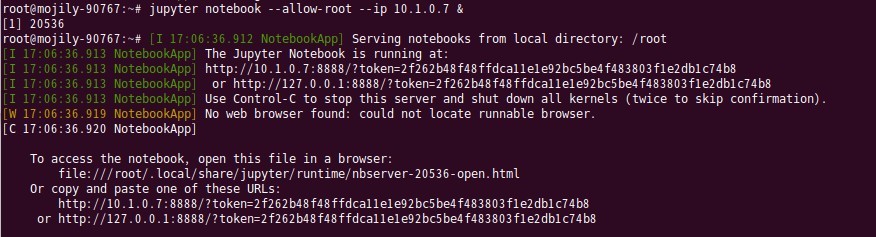
--ip NOTEBOOKAPP.IP
--port NOTEBOOKAPP.PORT
--port-retries NOTEBOOKAPP.PORT_RETRIES
--transport KERNELMANAGER.TRANSPORT
--keyfile NOTEBOOKAPP.KEYFILE
--certfile NOTEBOOKAPP.CERTFILE
--client-ca NOTEBOOKAPP.CLIENT_CA
--notebook-dir NOTEBOOKAPP.NOTEBOOK_DIR
--browser NOTEBOOKAPP.BROWSER
--pylab [NOTEBOOKAPP.PYLAB]
--gateway-url GATEWAYCLIENT.URL
--debug
--generate-config
-y, --y
--no-browser
--no-mathjax
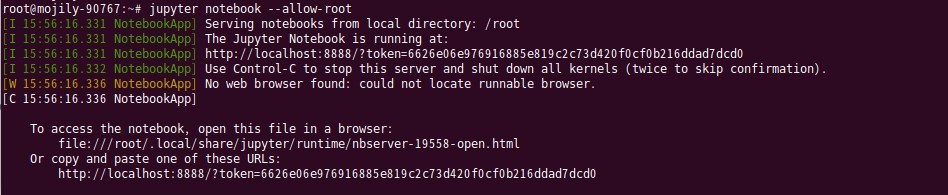
--allow-root
--script
--no-script