리눅스 환경에서 대개는 history 명령어를 이용하여 사용한 명령어들을 추적 관리한다.여기서 조금 더나아가면 명령어에 날짜/시간이나 저장할 라인수 설정하는 정도일것이다.
history 명령어에 한계는 결과값 출력은 기록되지 않는다는 것이다. 이것저것 테스트하고 결과를 정리하다보면 출력값은 전후사항을 비교할때에 반드시 필요한 부분이다.
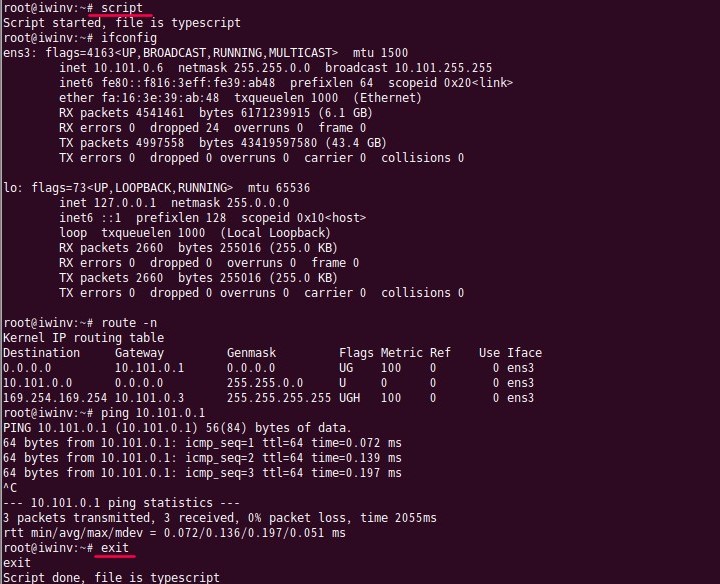
script 명령어는 터미널 세션을 파일로 캡처하거나 기록하는데 사용되는 도구이며 기록된 세션은 scriptplay 를 이용해서 재생가능하다.
script – make typescript of terminal session
scriptreplay – play back typescripts, using timing information
Install
Ubuntu
# apt-get install -y util-linux
CentOS
# yum install -y util-linux
사용법
# script {option} {filename}
파일명을 정의하지 않으면 typescript 이라는 파일로 저장된다.
Usage:
script [options] [file]
Make a typescript of a terminal session.
Option
-a, --append append the output
-c, --command <command> run command rather than interactive shell
-e, --return return exit code of the child process
-f, --flush run flush after each write
--force use output file even when it is a link
-q, --quiet be quiet
-t[<file>], --timing[=<file>] output timing data to stderr or to FILE
-h, –help display this help
-V, –version display version
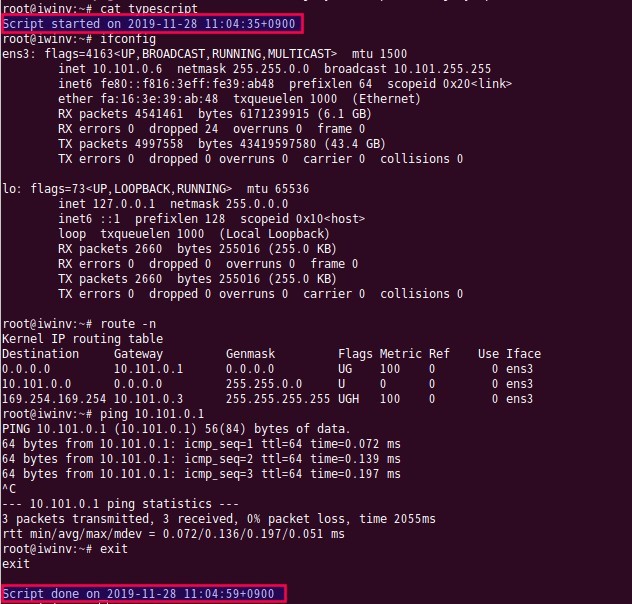
cat 이나 vi등을 이용하여 파일을 열어보면 명령어 결과값과 함께 기록을 시작하고 끝나는 시간이 기록되어있다.
원하는 파일명은 아래처럼 입력가능하다.
# script sessions-log-$(date +%Y-%m%d-%T).txt
여러 옵션중 한가지만 소개하자면 -t (timing) 는 명령어 기록들을 시간별로 나열하여 재생 명령어(scriptreplay)와 결합하면 시간기록 순서대로 shell상에서 동적인 영상처럼 표현되기도 한다.
# script –timing=timing.txt session.log
.............................
.............................
# scriptreplay –timing=timing.txt session.log
.............................
.............................
로그인 세션마다 파일로 기록하려면 아래처럼 활용가능하다.
# cat /etc/profile
.............................
.............................
if [ “x$SESSION_RECORD” = “x” ]
then
timestamp=$(date +%Y-%m%d-%T)
session_log=/var/log/history/session.$USER.$$.$timestamp
SESSION_RECORD=started
export SESSION_RECORD
script -t -f -q 2>${session_log}.timing $session_log
exit
fi
:: 로그저장 디렉토리
# mkdir /var/log/history
# exit
:: 이후 로그인부터는 설정 경로에 파일로 기록
# ls -l /var/log/history
-rw-r–r– 1 root root 2592 Nov 28 12:55 session.root.4421.2019-1128-12:54:51
-rw-r–r– 1 root root 1282 Nov 28 12:55 session.root.4421.2019-1128-12:54:51.timing